

Create your first AI Shoot
With AI Shoot, you can produce high-quality on-model imagery at scale for your product description pages. This guide walks you through the key steps to get started.
Like in a traditional photoshoot, you need specific ingredients to run an AI shoot:
- Products (SKUs)
- Models
- Specifications
Step 1: Add your SKUs
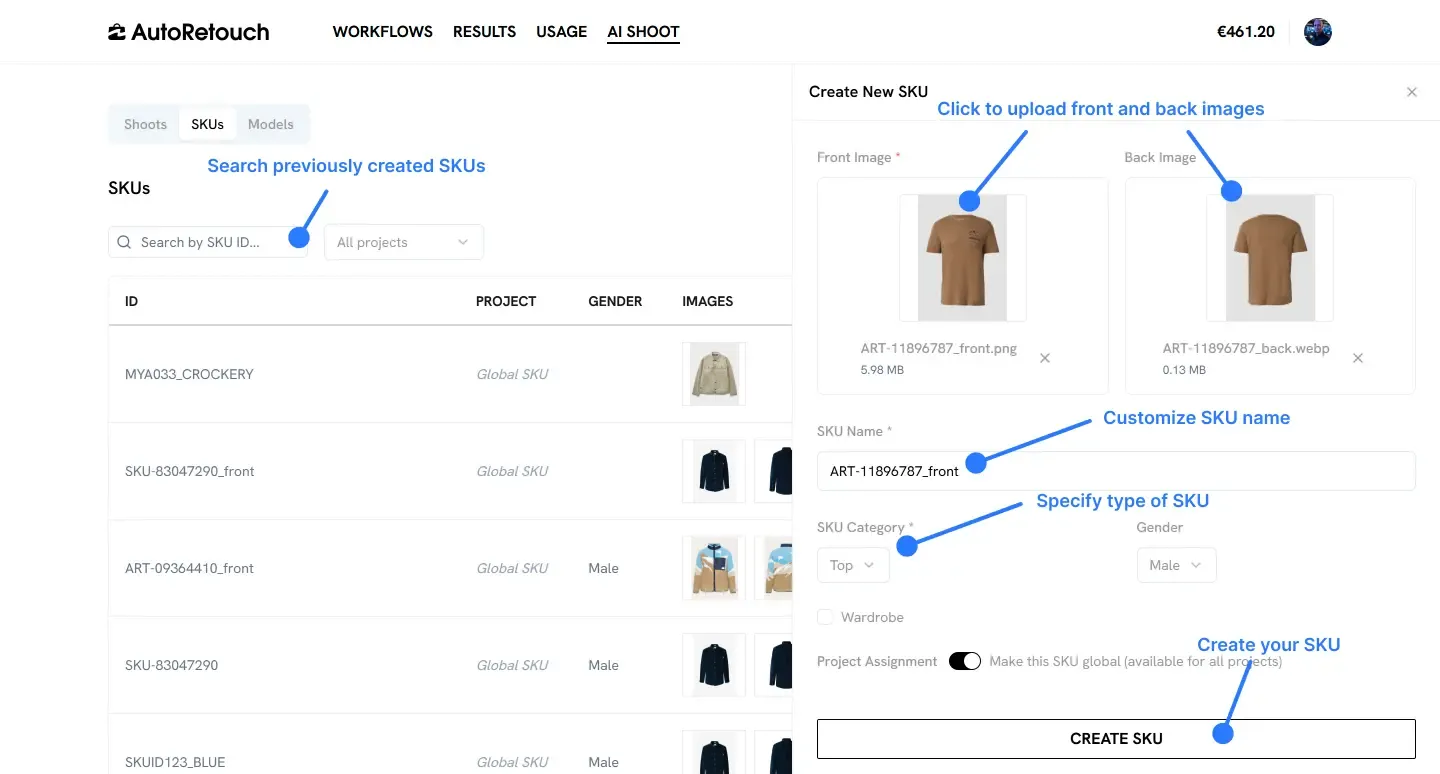
Section titled “Step 1: Add your SKUs”The first step is to add products (shown as SKUs in the UI) to the system. Each SKU you add can be reused in any number of Shoots.
Front and back images
Section titled “Front and back images”For each SKU, you should provide both a front and back image if you plan to produce back views. Even if you aren’t planning back views, providing both images is strongly recommended to maximize the quality of other views such as three-quarter angles.
SKU naming
Section titled “SKU naming”Your SKUs will be named after the front image filename. You can modify this value during upload. This naming is important because it will be used as the default for Looks, which determines how your exported files will be named. You can also search by this value throughout the AI Shoot UI.
Image quality requirements
Section titled “Image quality requirements”Make sure your input images follow our AI Shoot input requirements to ensure optimal results.
Step 2: Create a Shoot
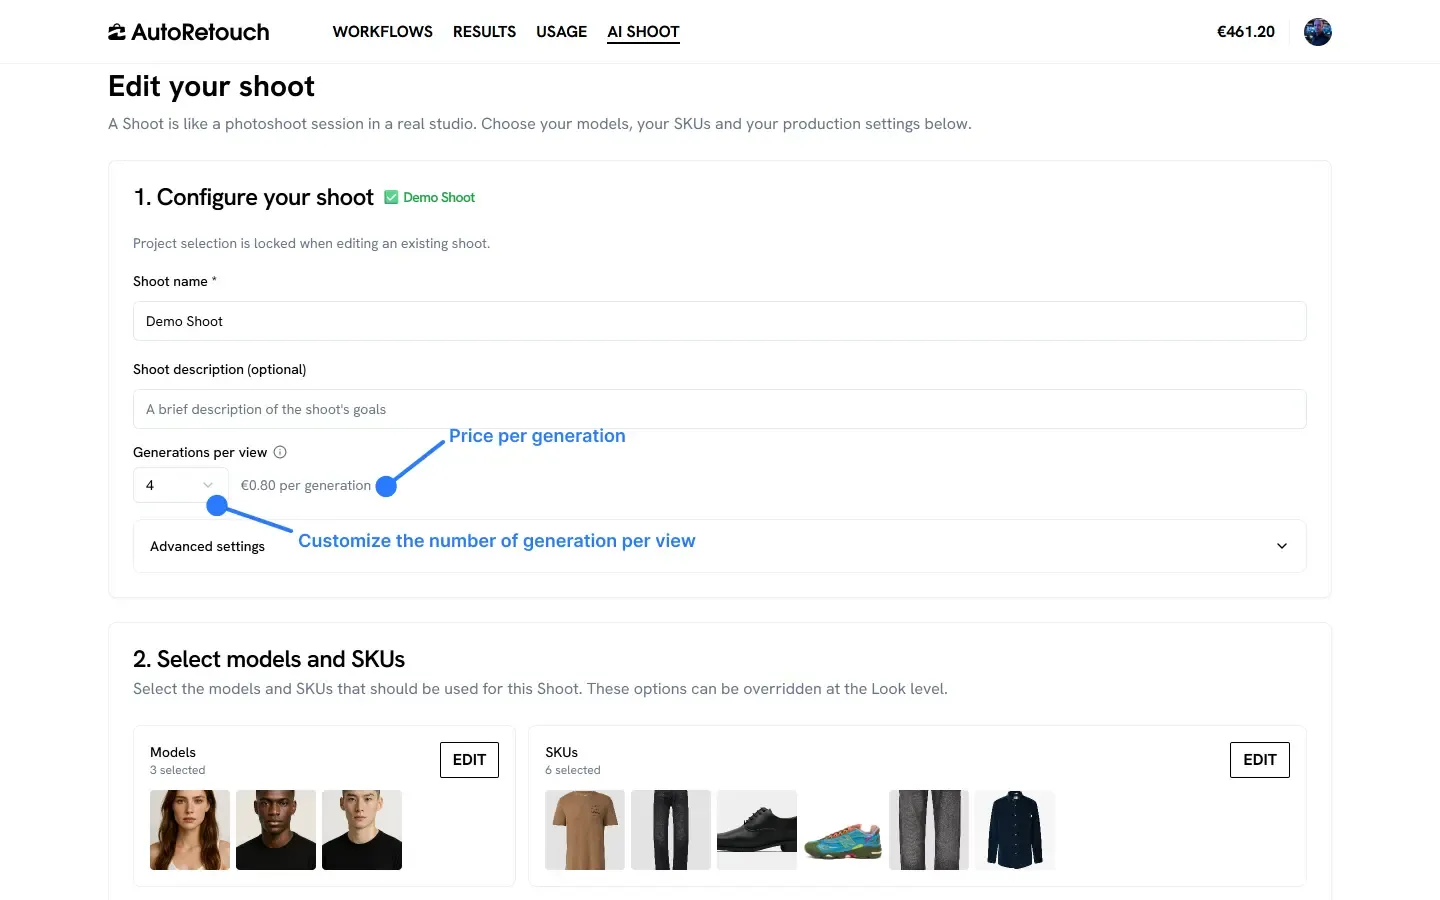
Section titled “Step 2: Create a Shoot”A Shoot defines what you want to shoot and how. On the Shoot page, you need to configure:
- Name - A descriptive name for your shoot
- Number of Generations - The number of generations to produce per view (billable)
Then:
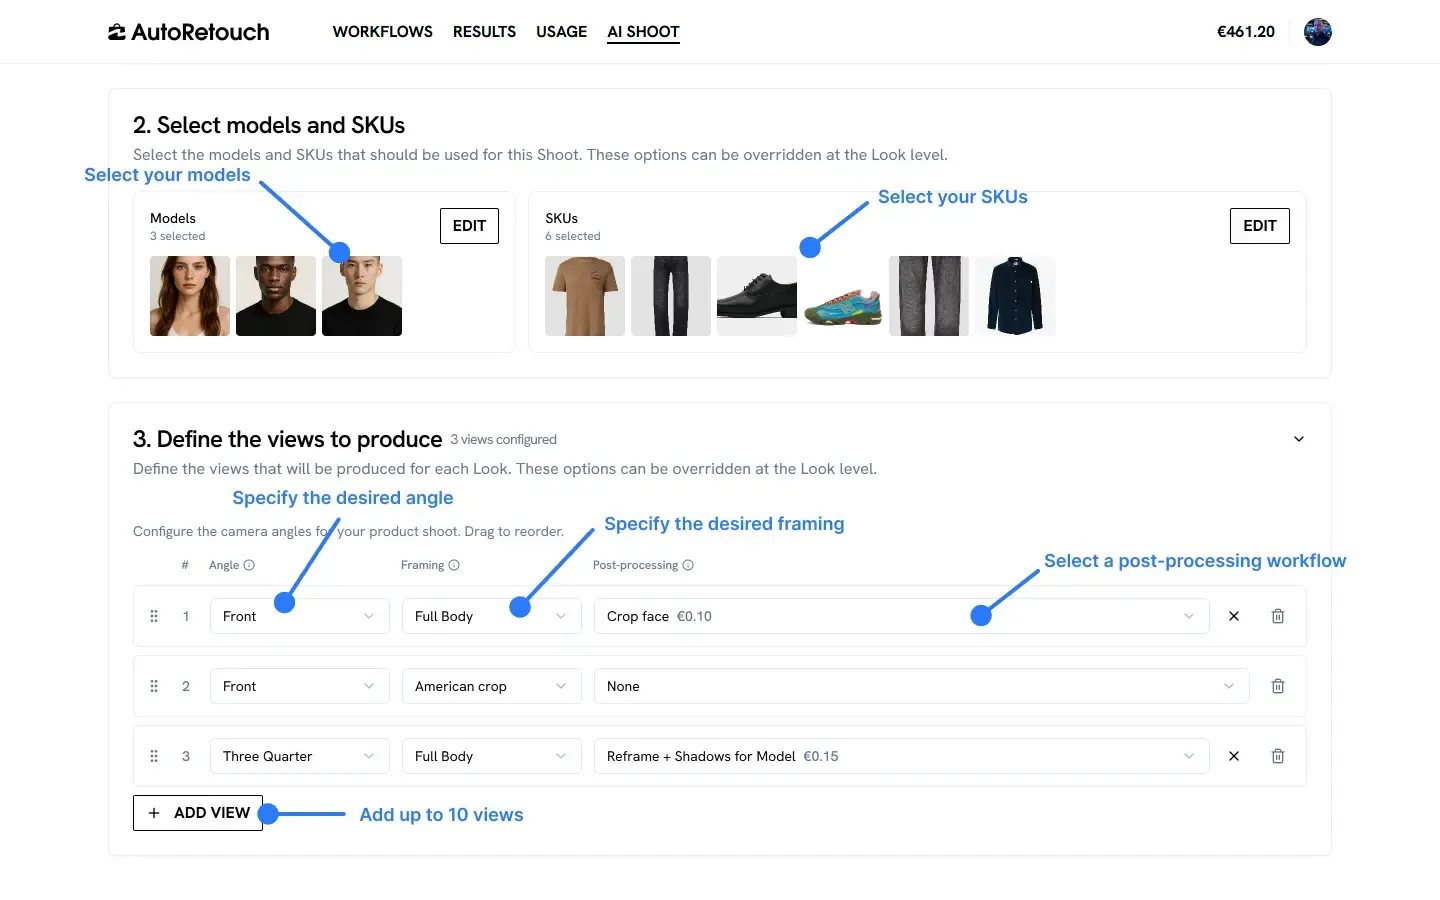
- Models - The AI models you want to use
- SKUs - The products you want to shoot
- Views - The angles you want to produce, including their framing and post-processing workflows
- Post-processing - This is optional but allows to customize background color (and the color you get is deterministic), margin and export format
Once configured, create the Shoot to proceed to Look creation.
Step 3: Create Looks
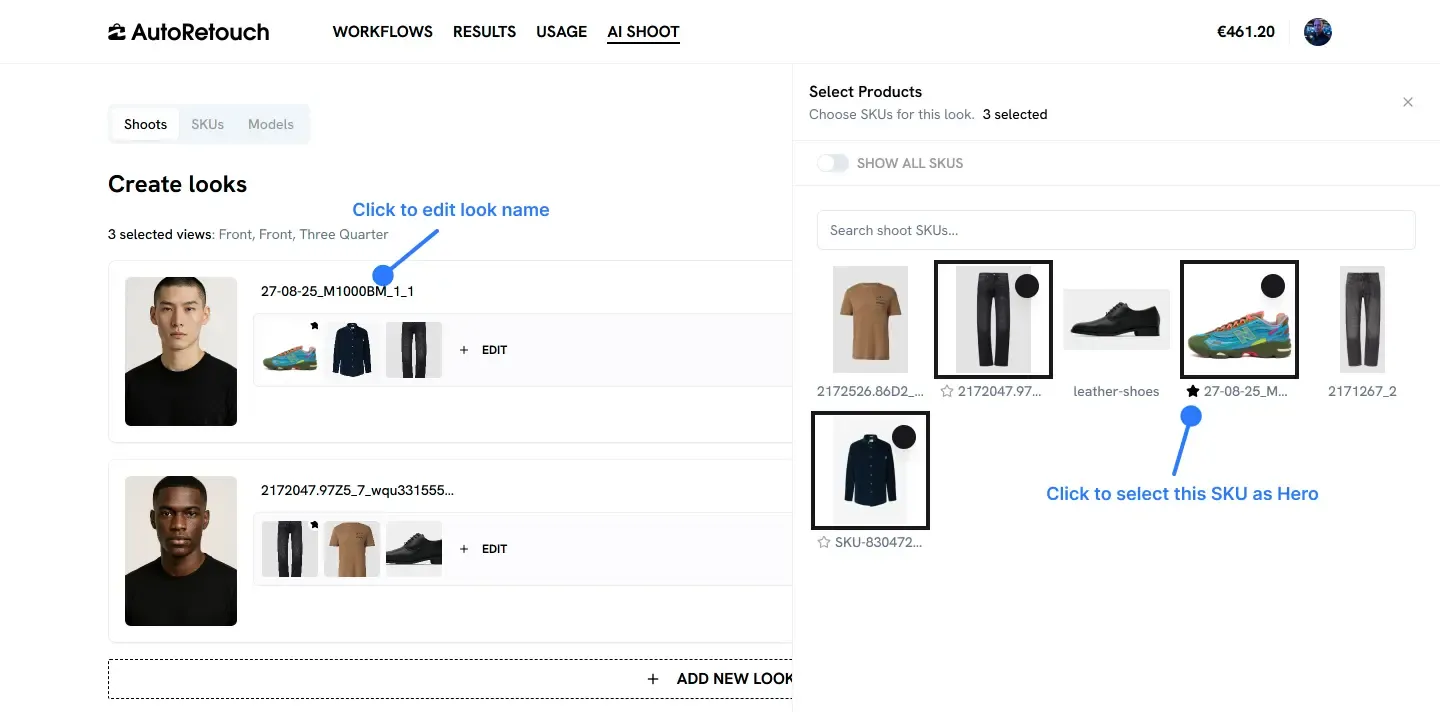
Section titled “Step 3: Create Looks”Looks are combinations of a model, SKUs, and styling options. Each Look will produce all the views configured at the Shoot level.
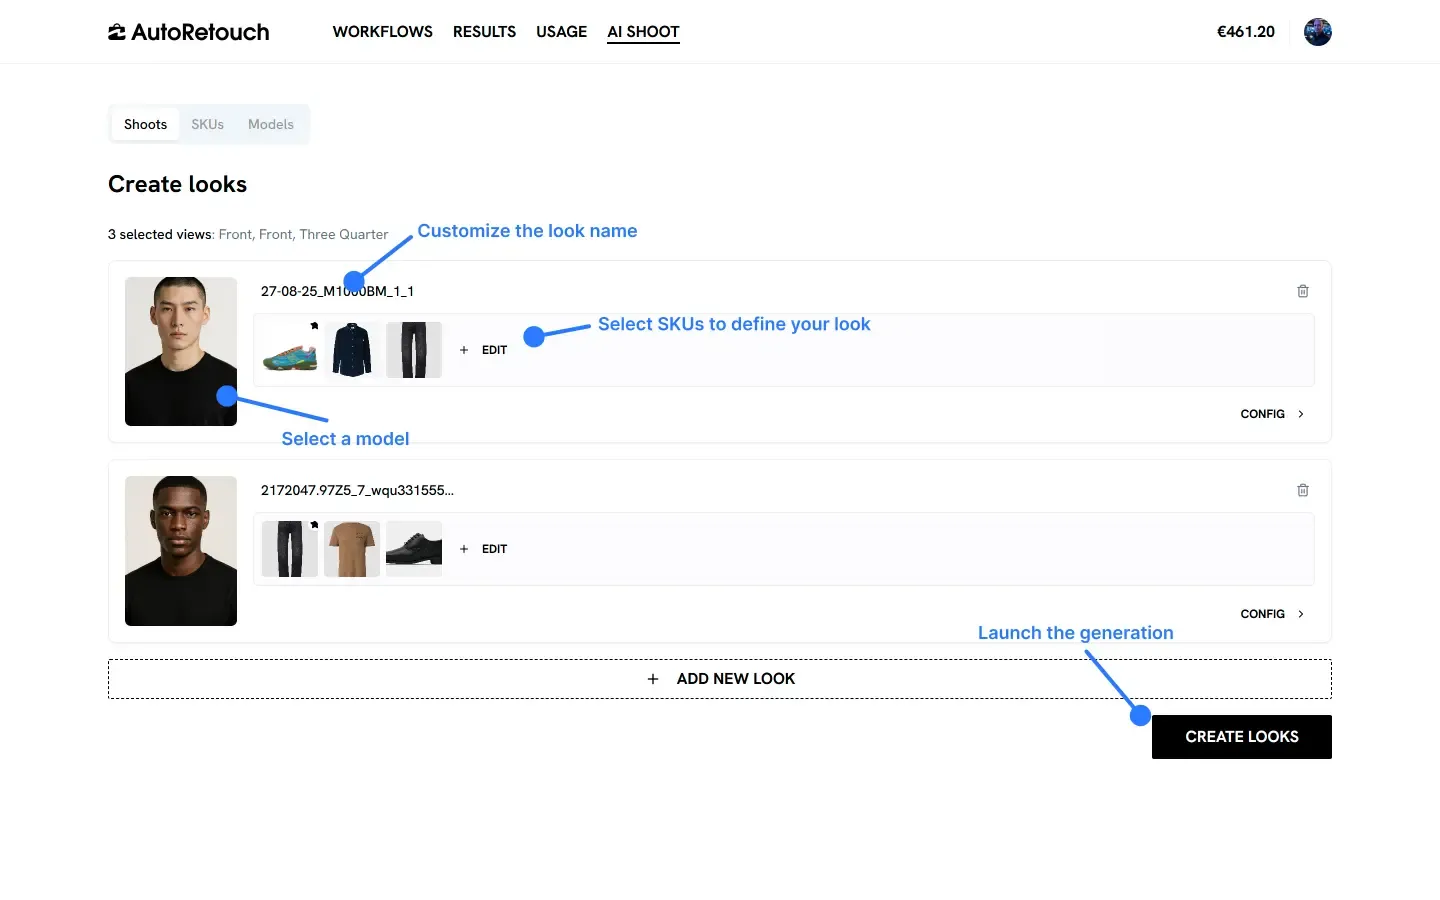
You can create as many Looks as needed, but we recommend starting with groups of 5 or fewer as you get familiar with the system.
Hero SKU and Look naming
Section titled “Hero SKU and Look naming”When you select a Hero SKU by clicking the star icon, the Look name will automatically match that SKU. You can override this with a custom value. Your final results will be named using this value combined with the view index.
Step 4: Review and select results
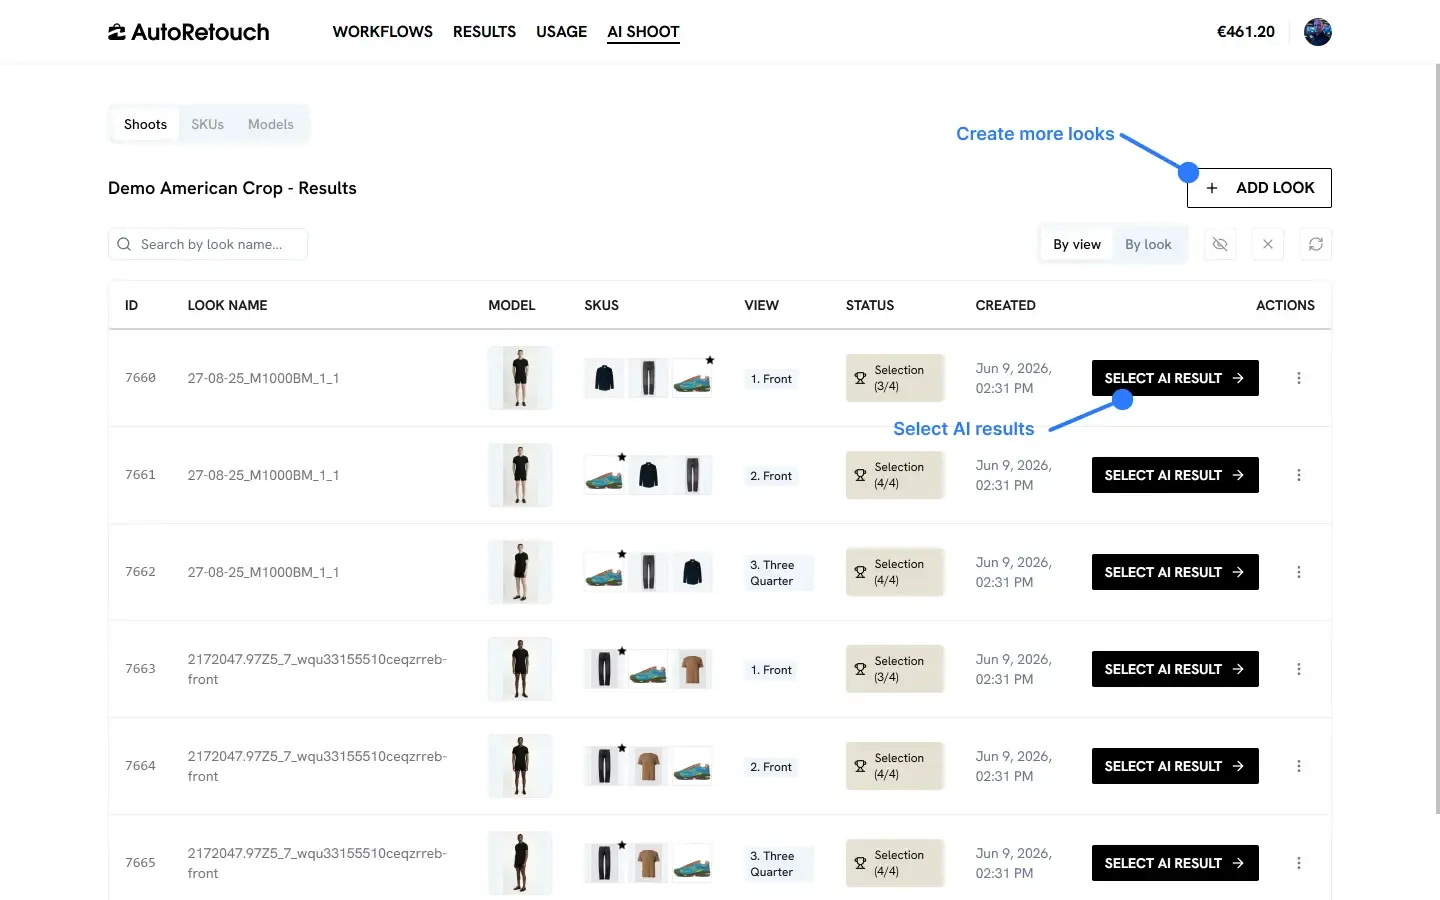
Section titled “Step 4: Review and select results”Once you’ve created your Looks, the system automatically starts generating your images. Generation typically takes 1-4 minutes per Look. You will land on the results page, which can be viewed by view or by Look.
Selecting winning results
Section titled “Selecting winning results”Use the “by view” page to select the winning results generated by the AI. You must select at least one image to be able to download your results.
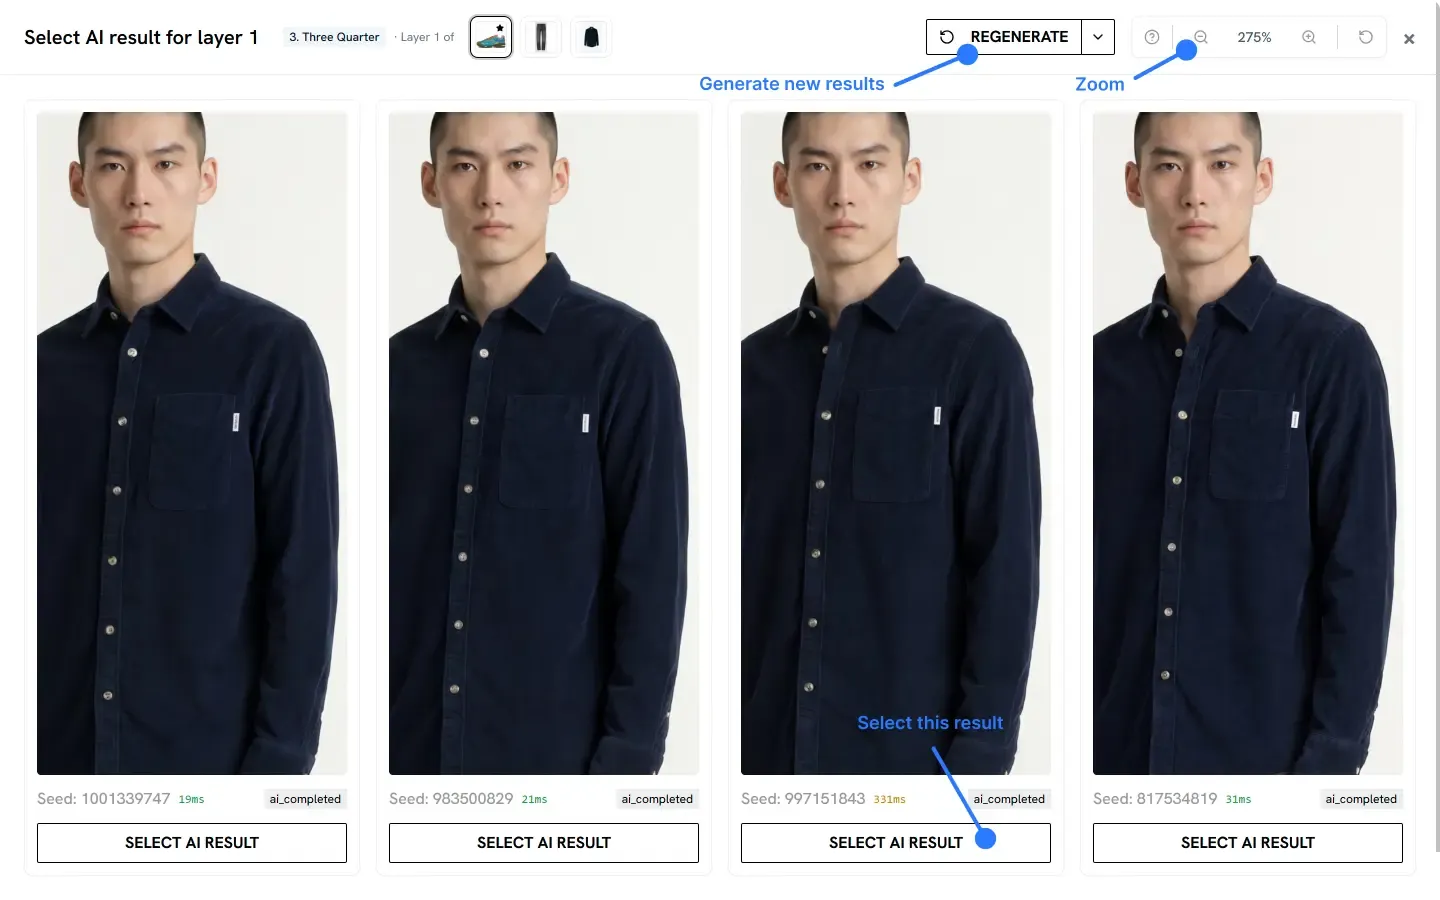
If none of the generated variations match your expectations, you can retry all, but keep in mind this will consume additional credits (same cost as the initial generation).
Post-processing
Section titled “Post-processing”Once an image is selected, it will go through the post-processing workflow configured at the Shoot level (if one exists). This sets your image to your target specifications. This process can take several minutes depending on the workflow used and system load.
Step 5: Download your results
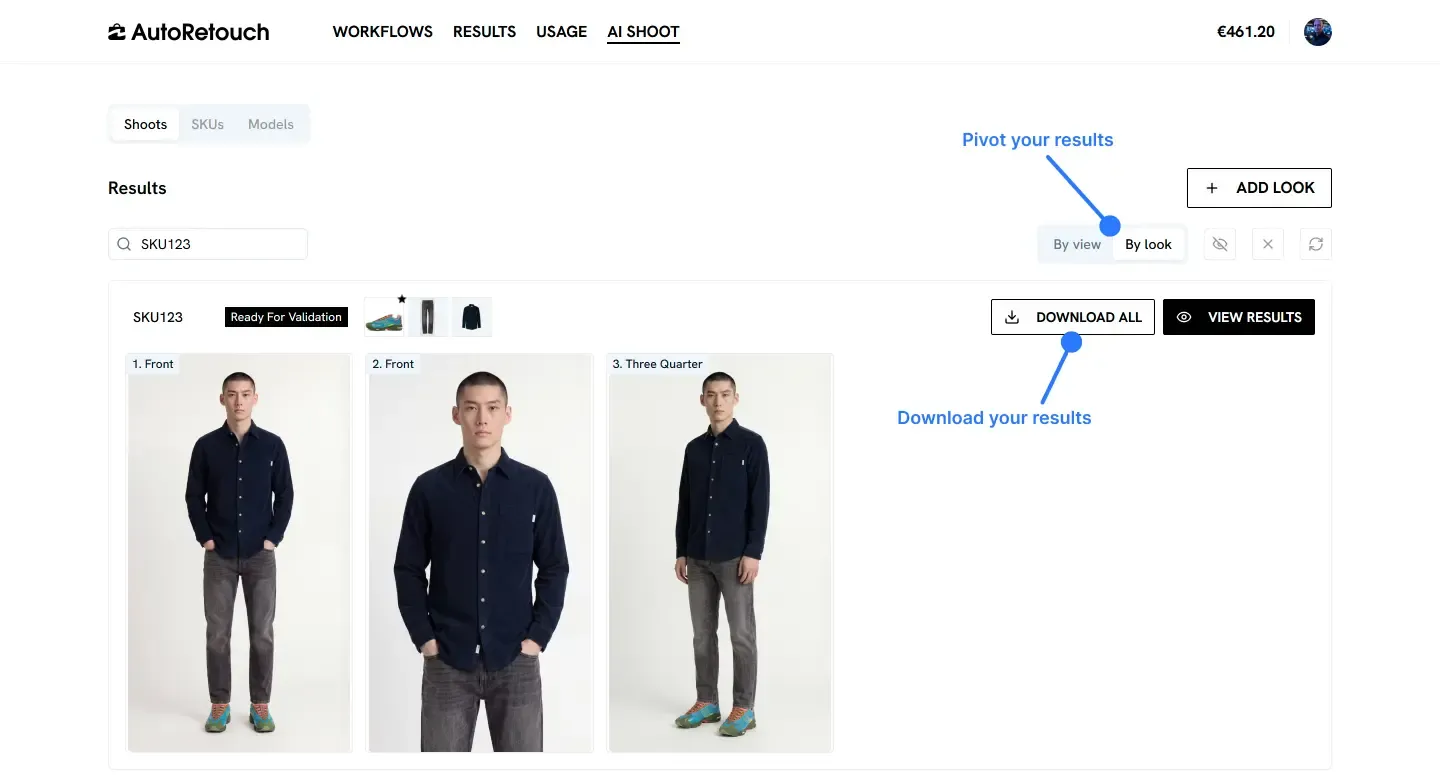
Section titled “Step 5: Download your results”Once processing is complete, download your results from either the “by view” or “by look” page.
Next steps
Section titled “Next steps”Looking to automate your AI Shoot workflow? See the AI Shoot API documentation to manage SKUs and retrieve results programmatically.