

Create and manage SKUs
SKUs are the products you shoot. Before you can create a Shoot, you need SKUs in your library, and each SKU you create can be reused in any number of Shoots.
You manage them from the SKUs tab of the AI Shoot section.
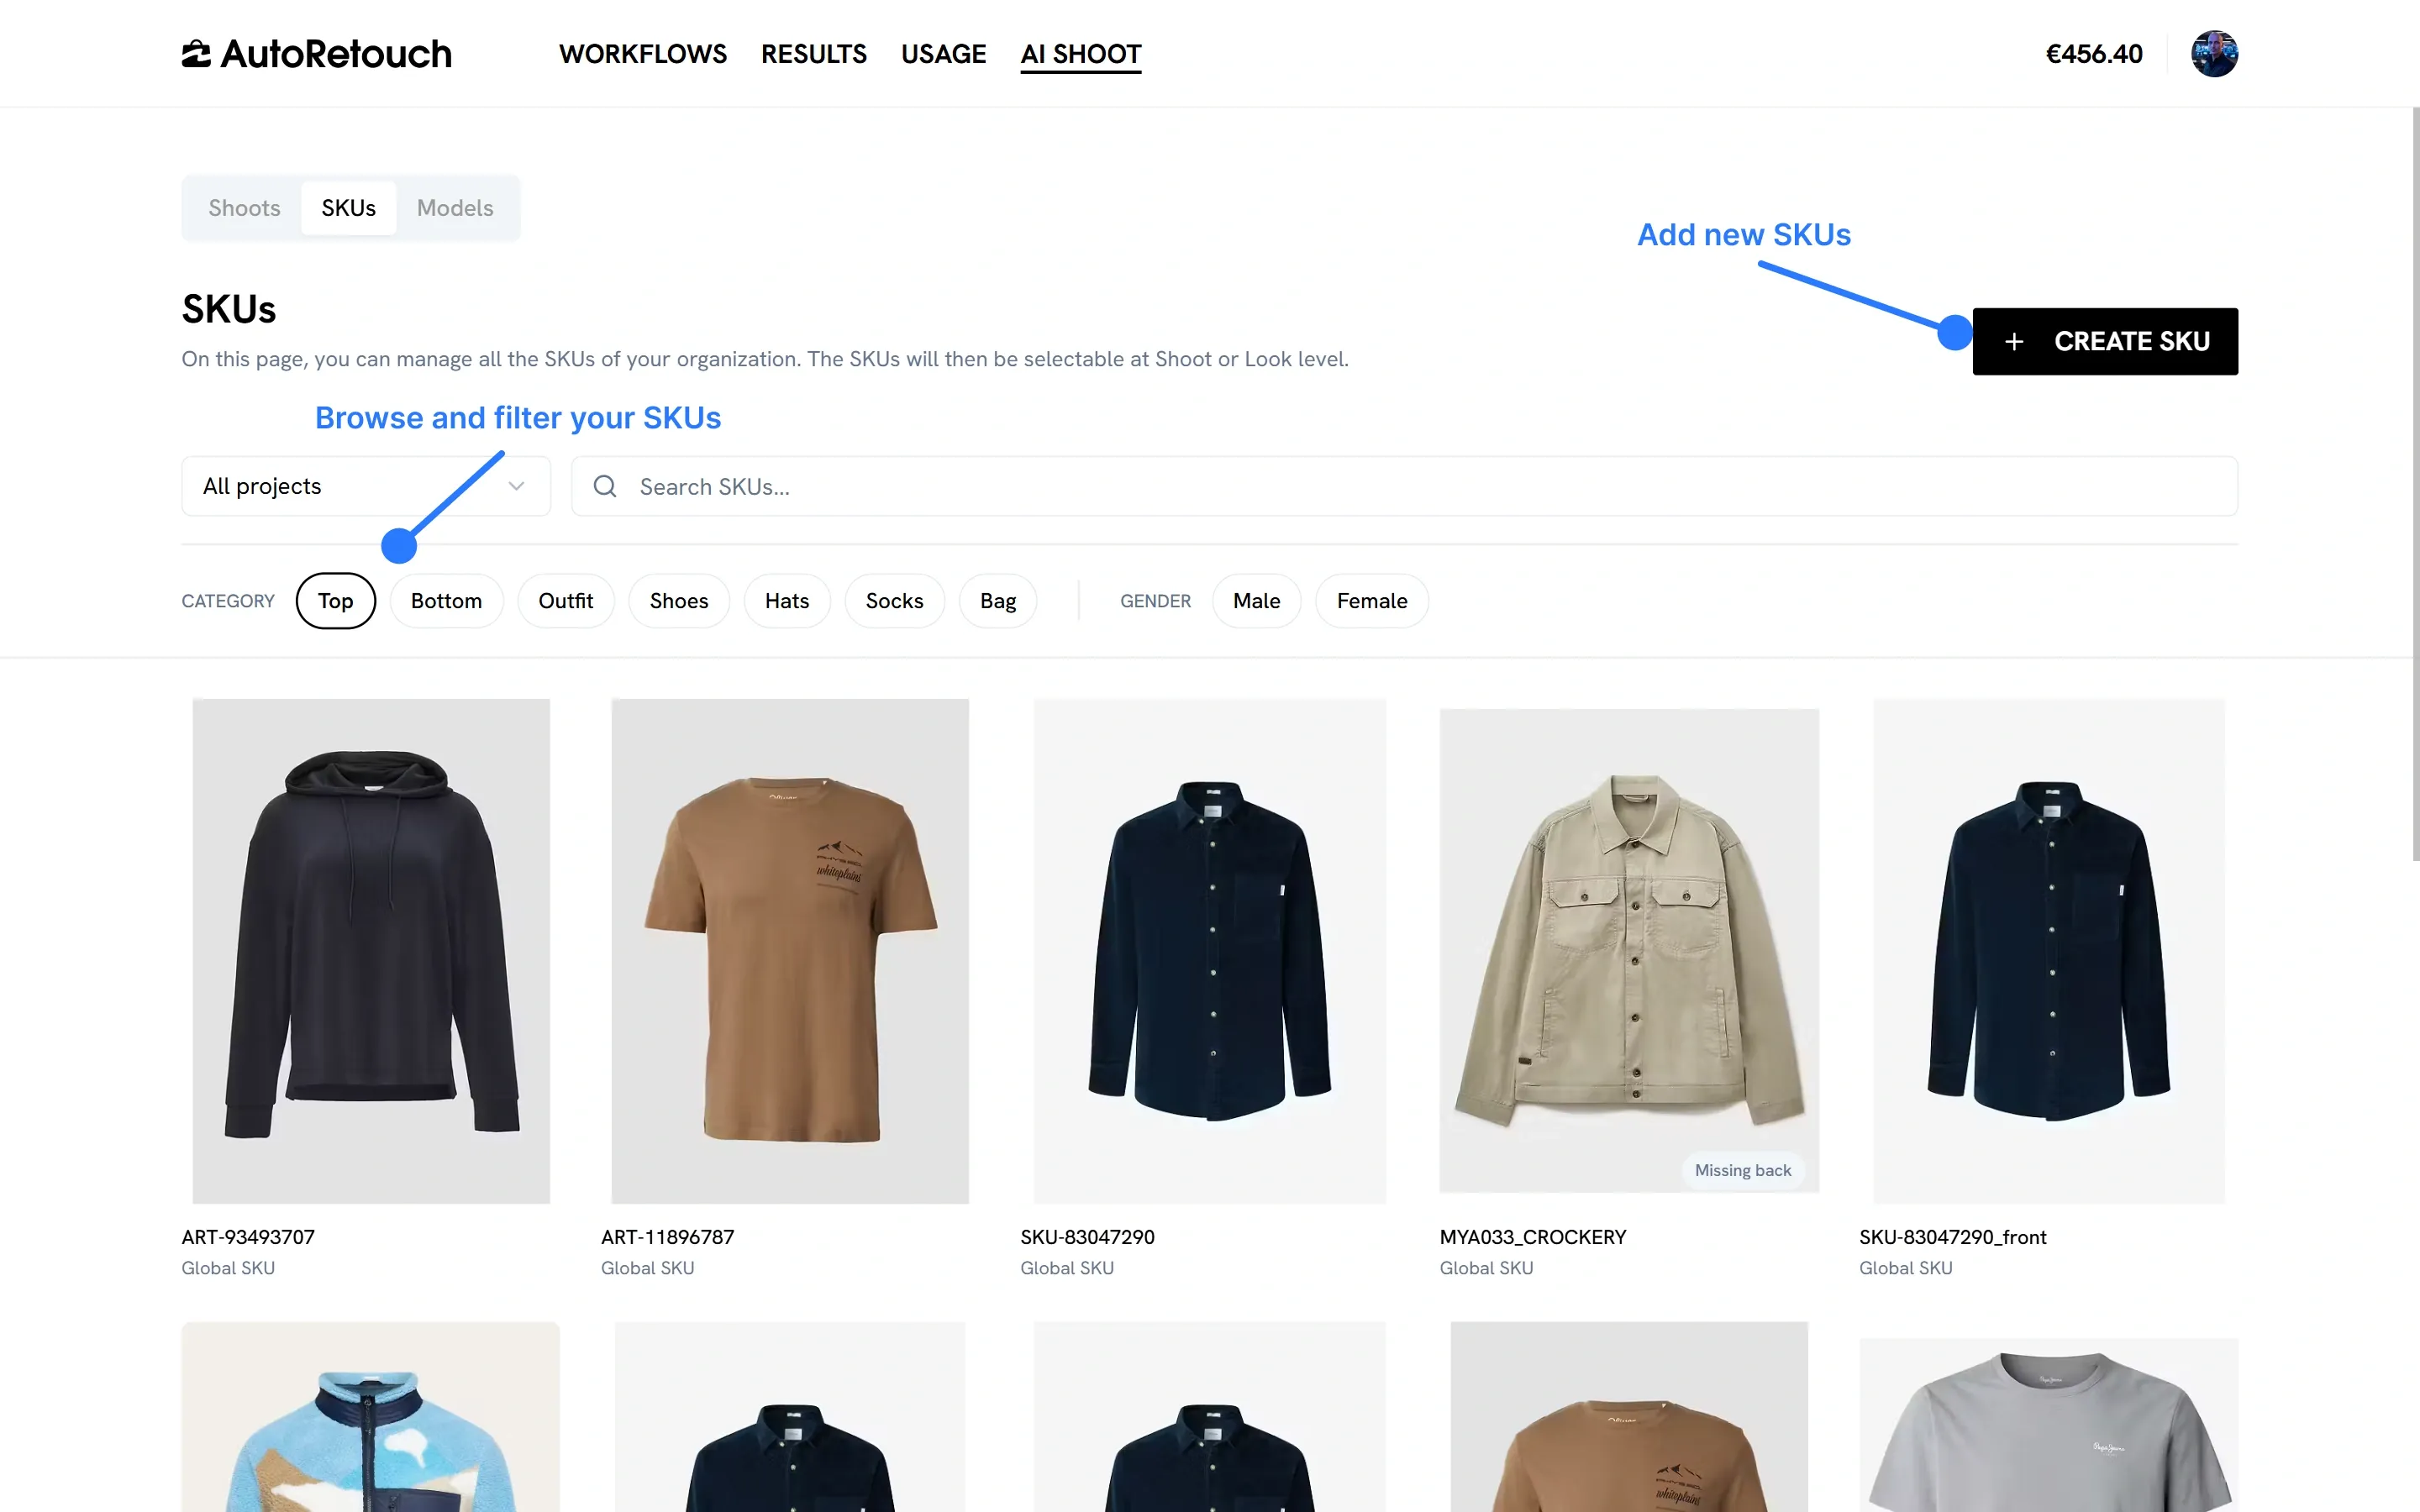
From this page you can:
- Create SKUs in bulk with the “Create SKU” button
- Search by SKU name
- Filter by project, category (Top, Bottom, Outfit, Shoes, Hats, Socks, Bag) and gender
Each card shows the SKU name and its scope. A “Missing back” badge tells you the SKU has no back image yet.
Step 1: Upload your images
Section titled “Step 1: Upload your images”Click “Create SKU” and drop your product images. You can upload as many as you want in one go, so there is no need to create SKUs one at a time.
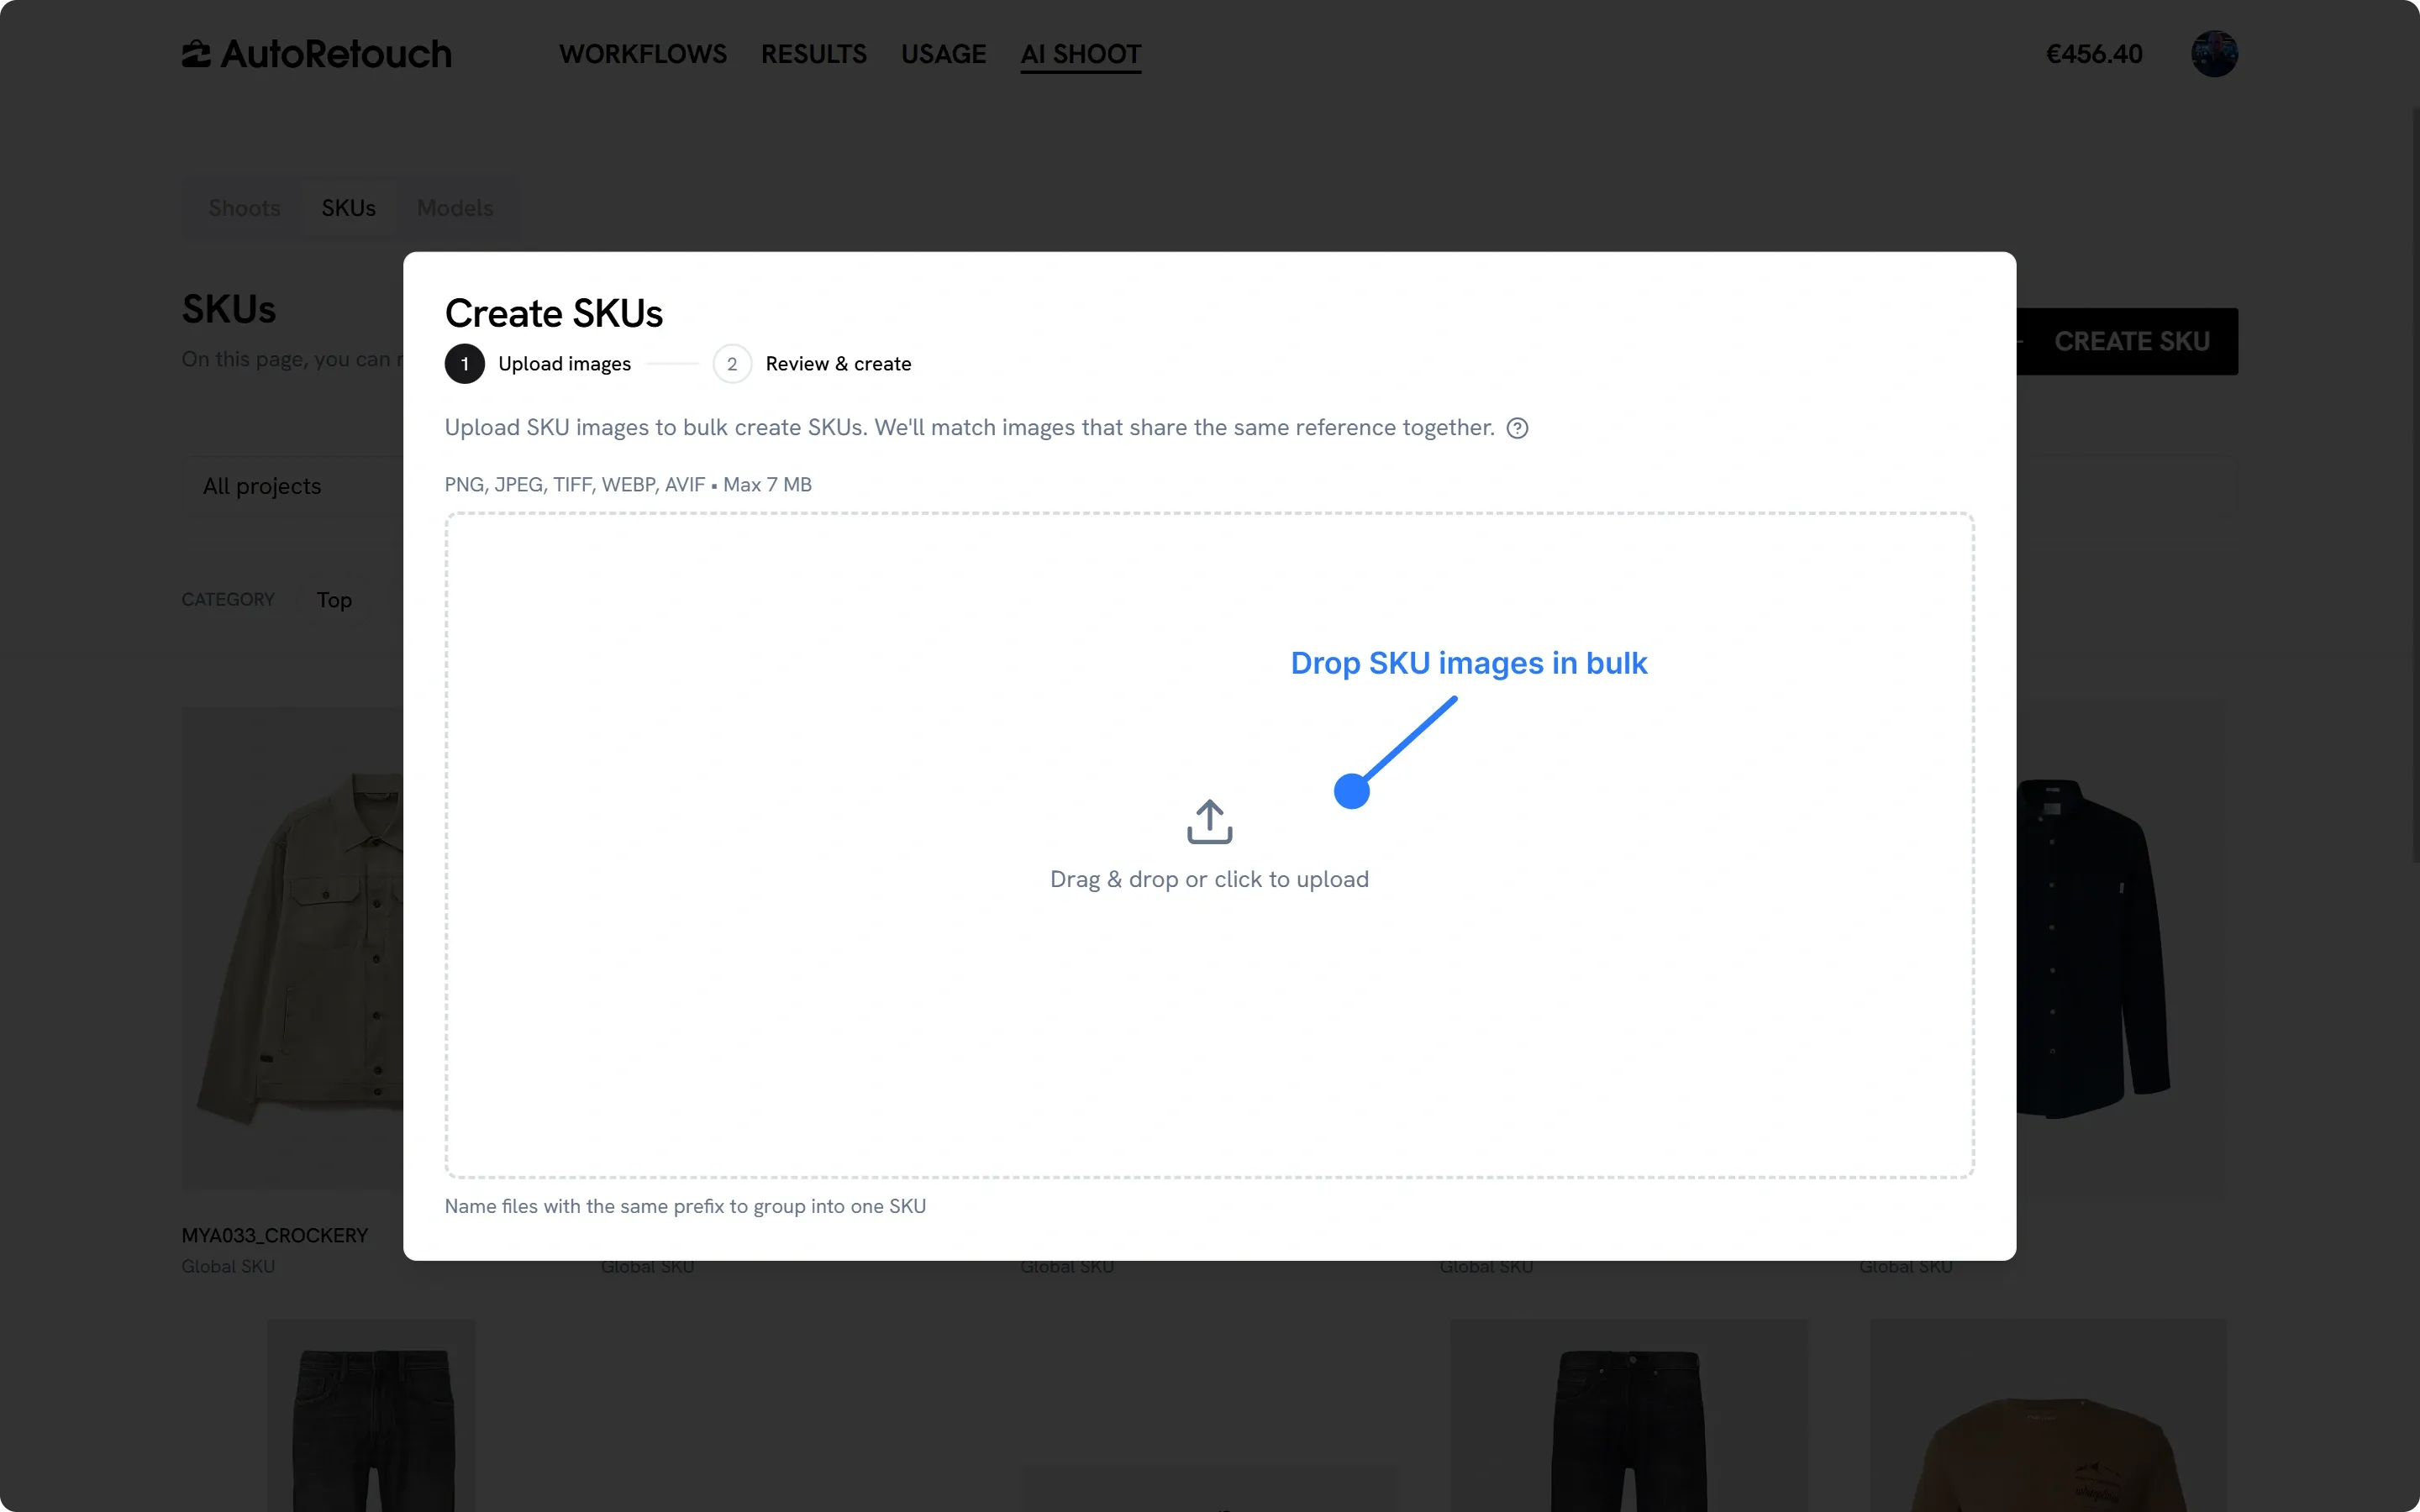
How images are grouped
Section titled “How images are grouped”Images that share the same reference are automatically matched into a single SKU. In practice, this means files named with the same prefix are grouped together:
| Filename | Result |
|---|---|
ART-11896787_front.jpg | Grouped into SKU ART-11896787 |
ART-11896787_back.jpg | Grouped into SKU ART-11896787 |
ART-93493707_front.jpg | Grouped into SKU ART-93493707 |
Naming your files consistently before you upload is the single biggest time saver in this flow, and it also sets the SKU names you will search by later.
Accepted files
Section titled “Accepted files”PNG, JPEG, TIFF, WEBP and AVIF, up to 7 MB per image.
Make sure your images also follow our AI Shoot input requirements so the AI has enough information to work with.
Front and back images
Section titled “Front and back images”Provide both a front and a back image for each SKU. Back images are required if you plan to produce back views, and they noticeably improve the quality of other angles such as three-quarters, so we recommend them even when you only need front views.
Step 2: Review and create
Section titled “Step 2: Review and create”The second step shows every SKU that was detected from your upload, so you can correct anything before it lands in your library.
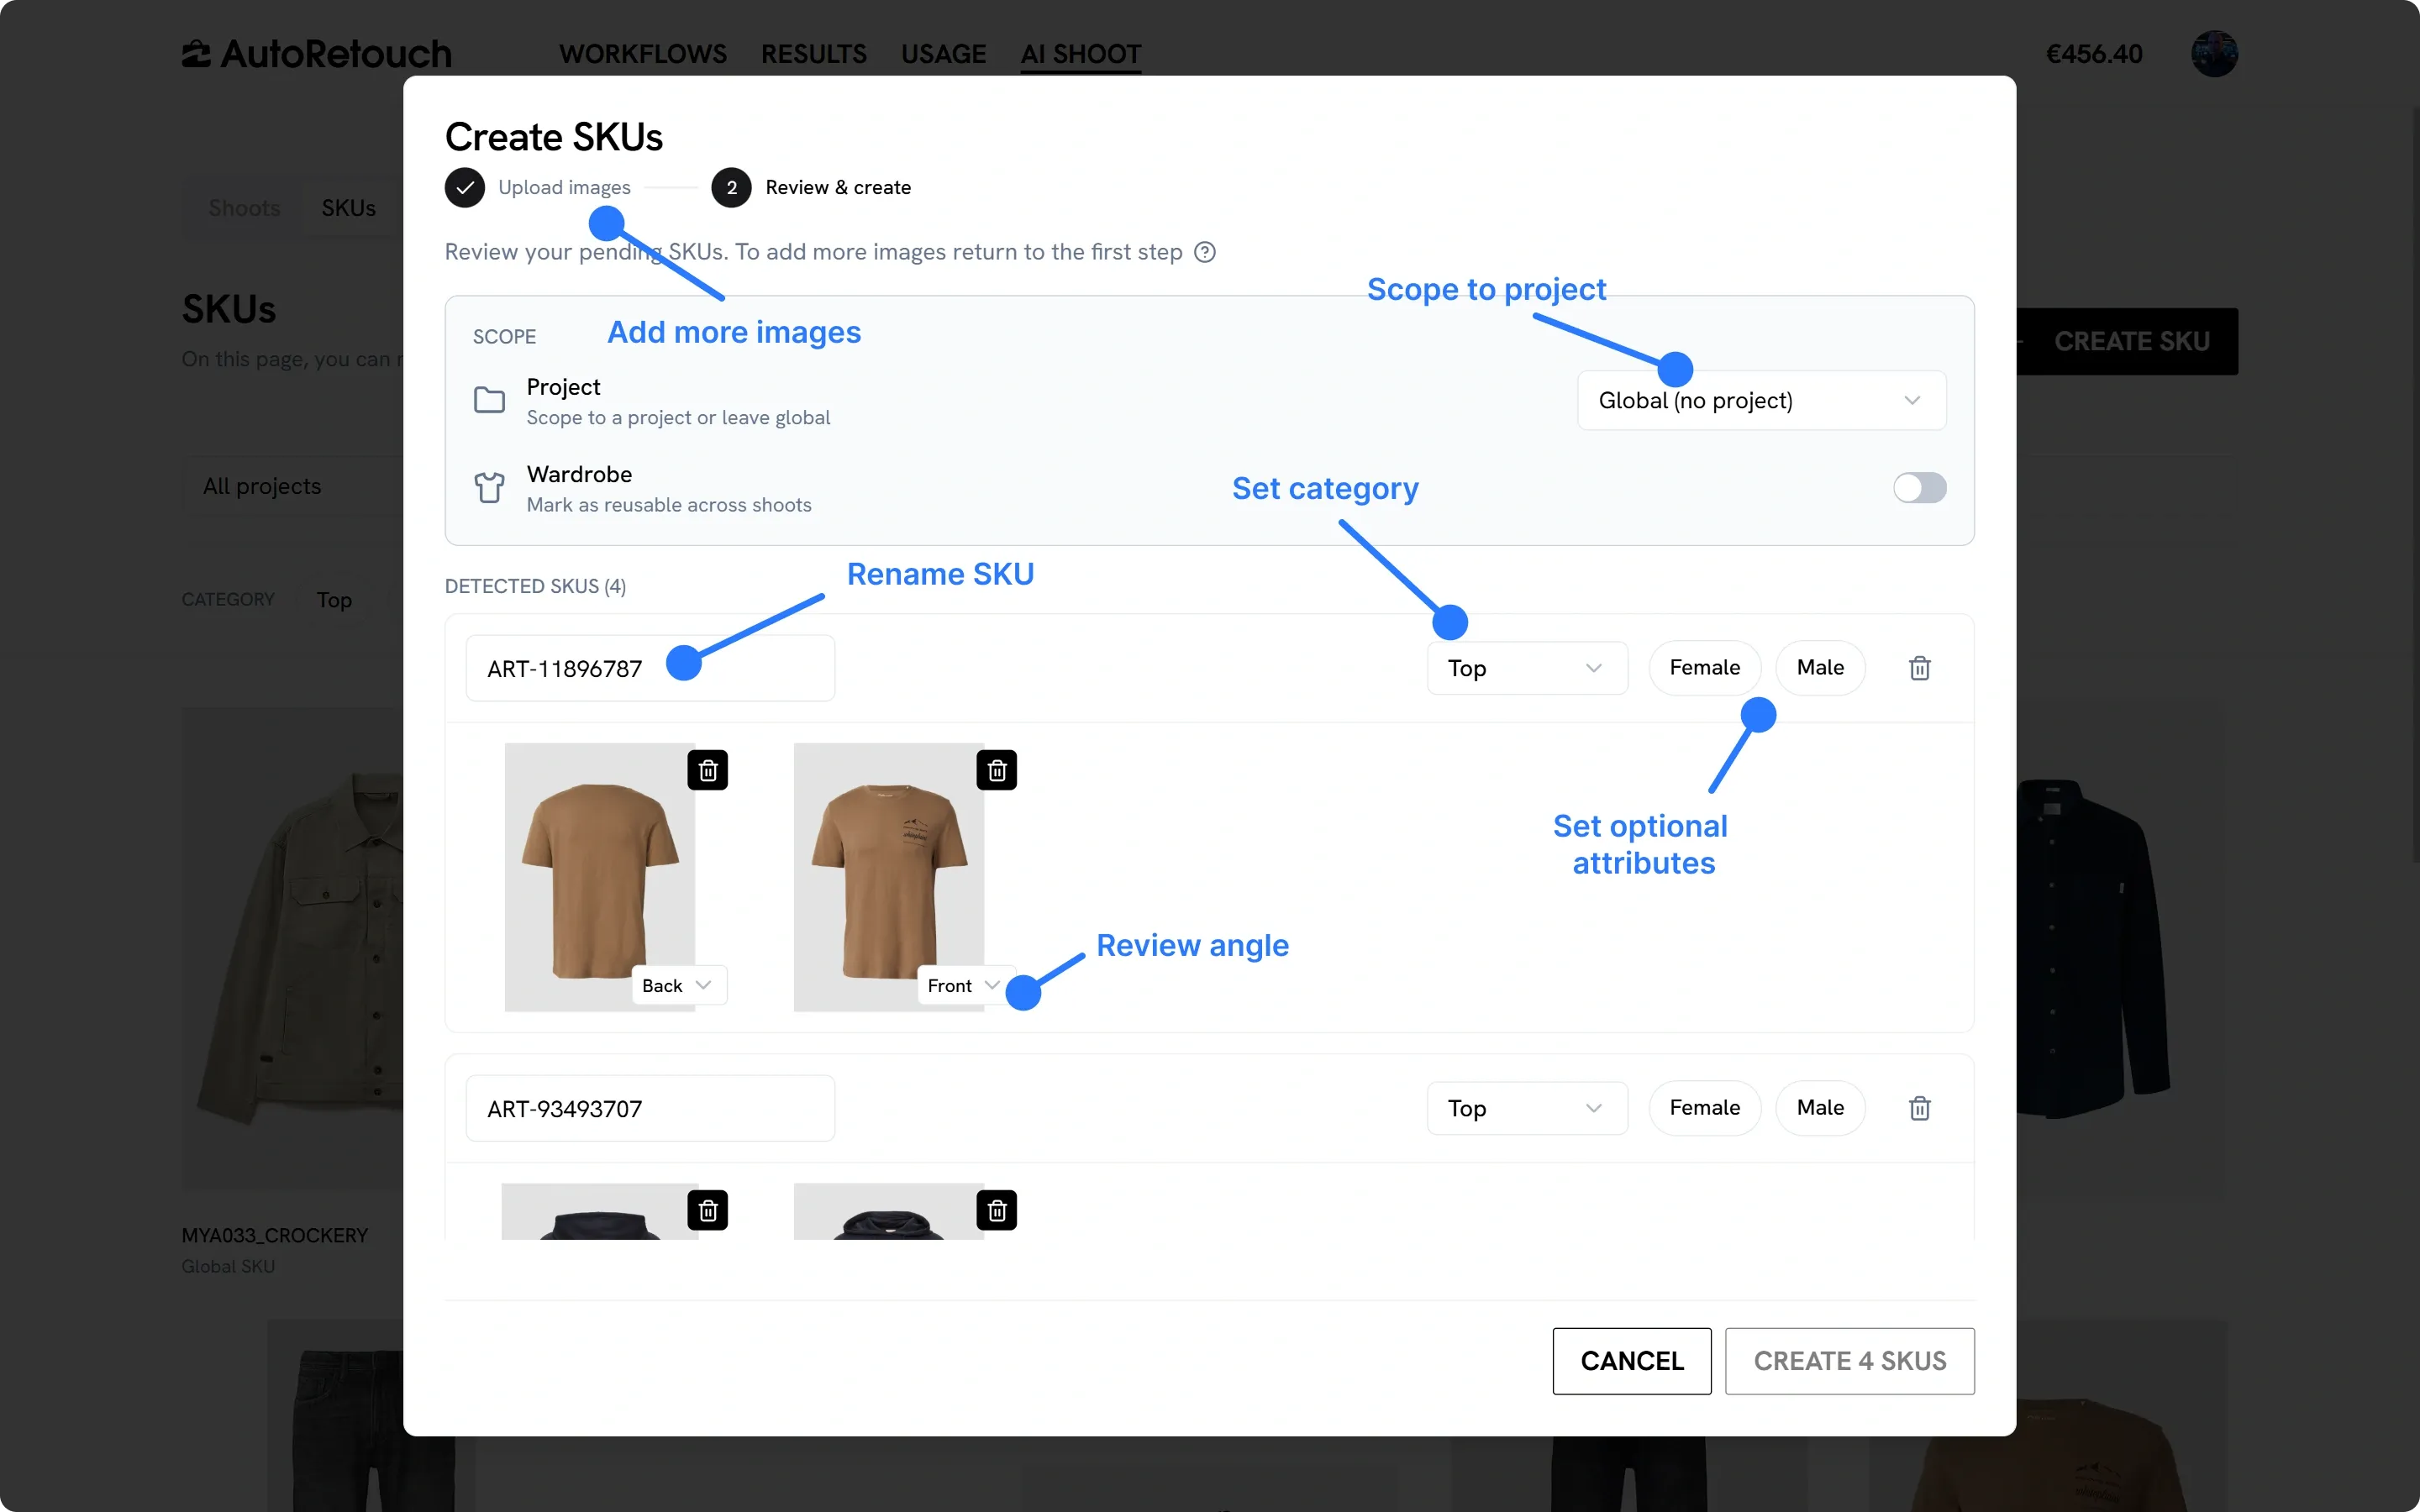
The scope applies to the whole batch:
- Project - Scope the SKUs to a project, or leave them global so they are available everywhere
- Wardrobe - Mark the SKUs as reusable across shoots
Per SKU
Section titled “Per SKU”For each detected SKU you can:
- Rename it, which also becomes the default name for the Looks it is used in and therefore for your exported files
- Set the category, which determines the styling options available at Look level
- Set optional attributes such as gender
- Check the angle detected for each image and switch it between front and back
- Remove an individual image, or the whole SKU, from the batch
If some images are missing, go back to the first step to add them without losing your review.
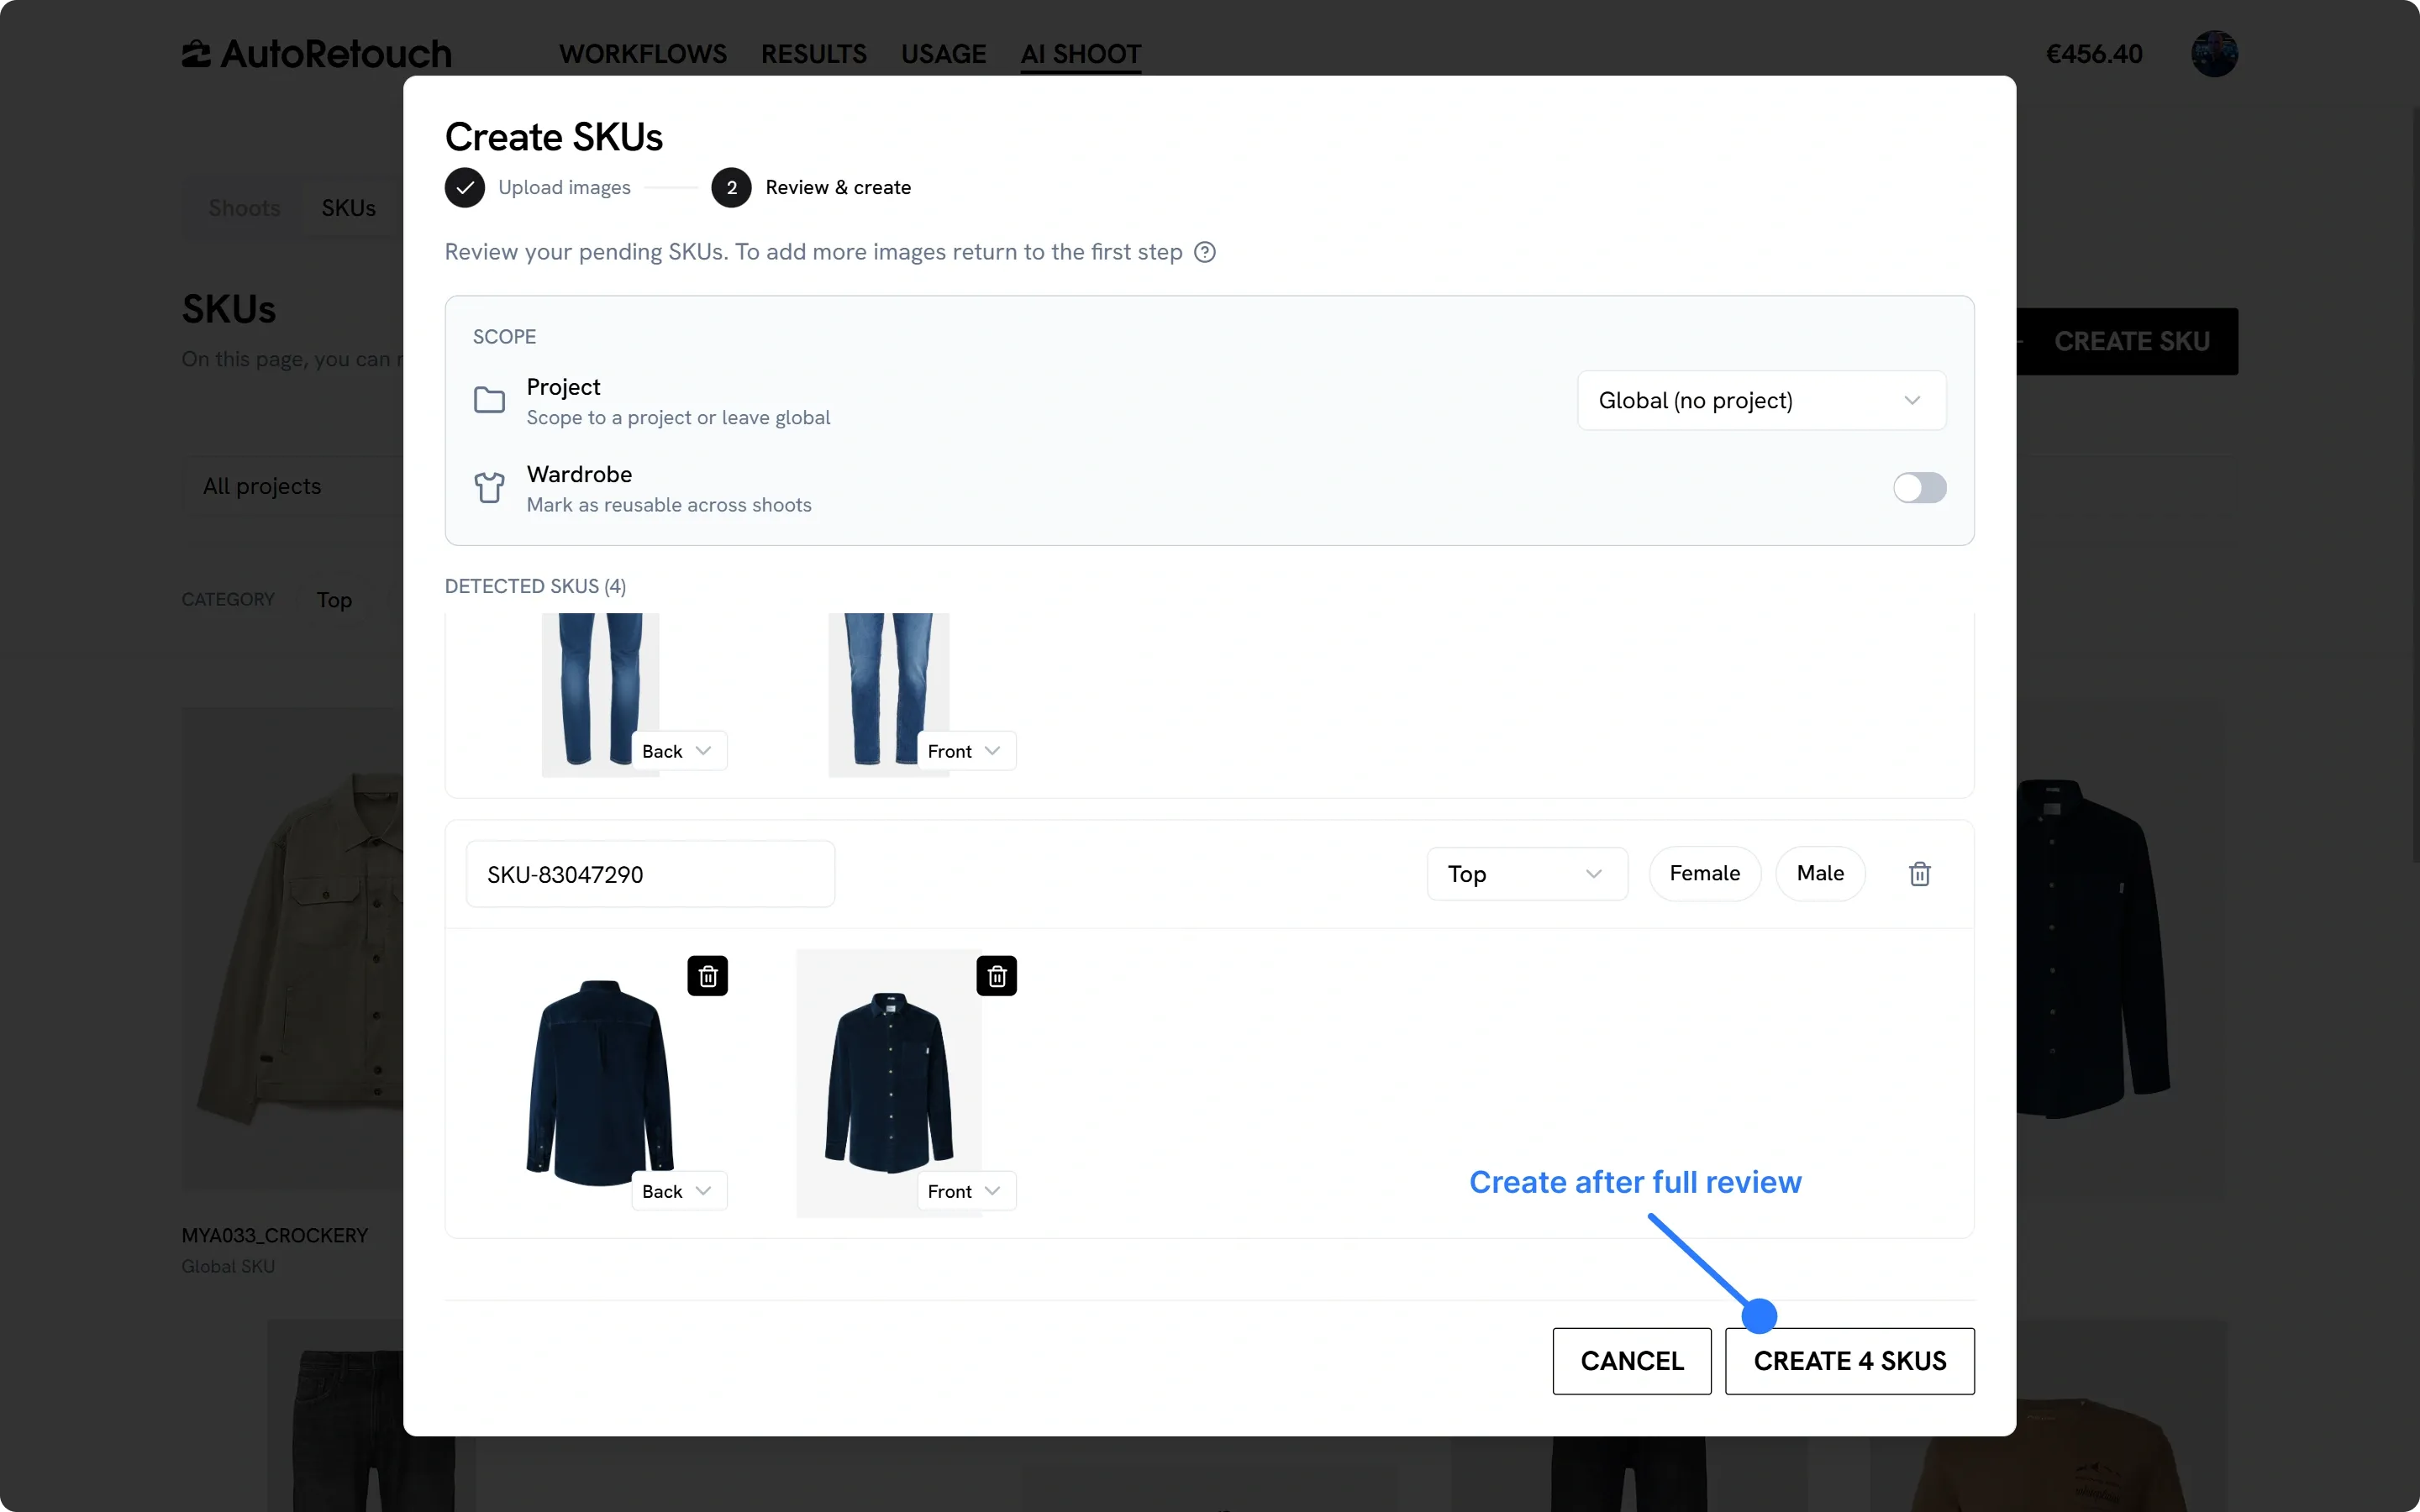
Once everything looks right, click “Create N SKUs” to add them to your library. Creating SKUs is free and isn’t billed, only generations are.
Edit an existing SKU
Section titled “Edit an existing SKU”Hover a SKU in the library to reveal its actions: download its source images, open the edit panel, or delete it.
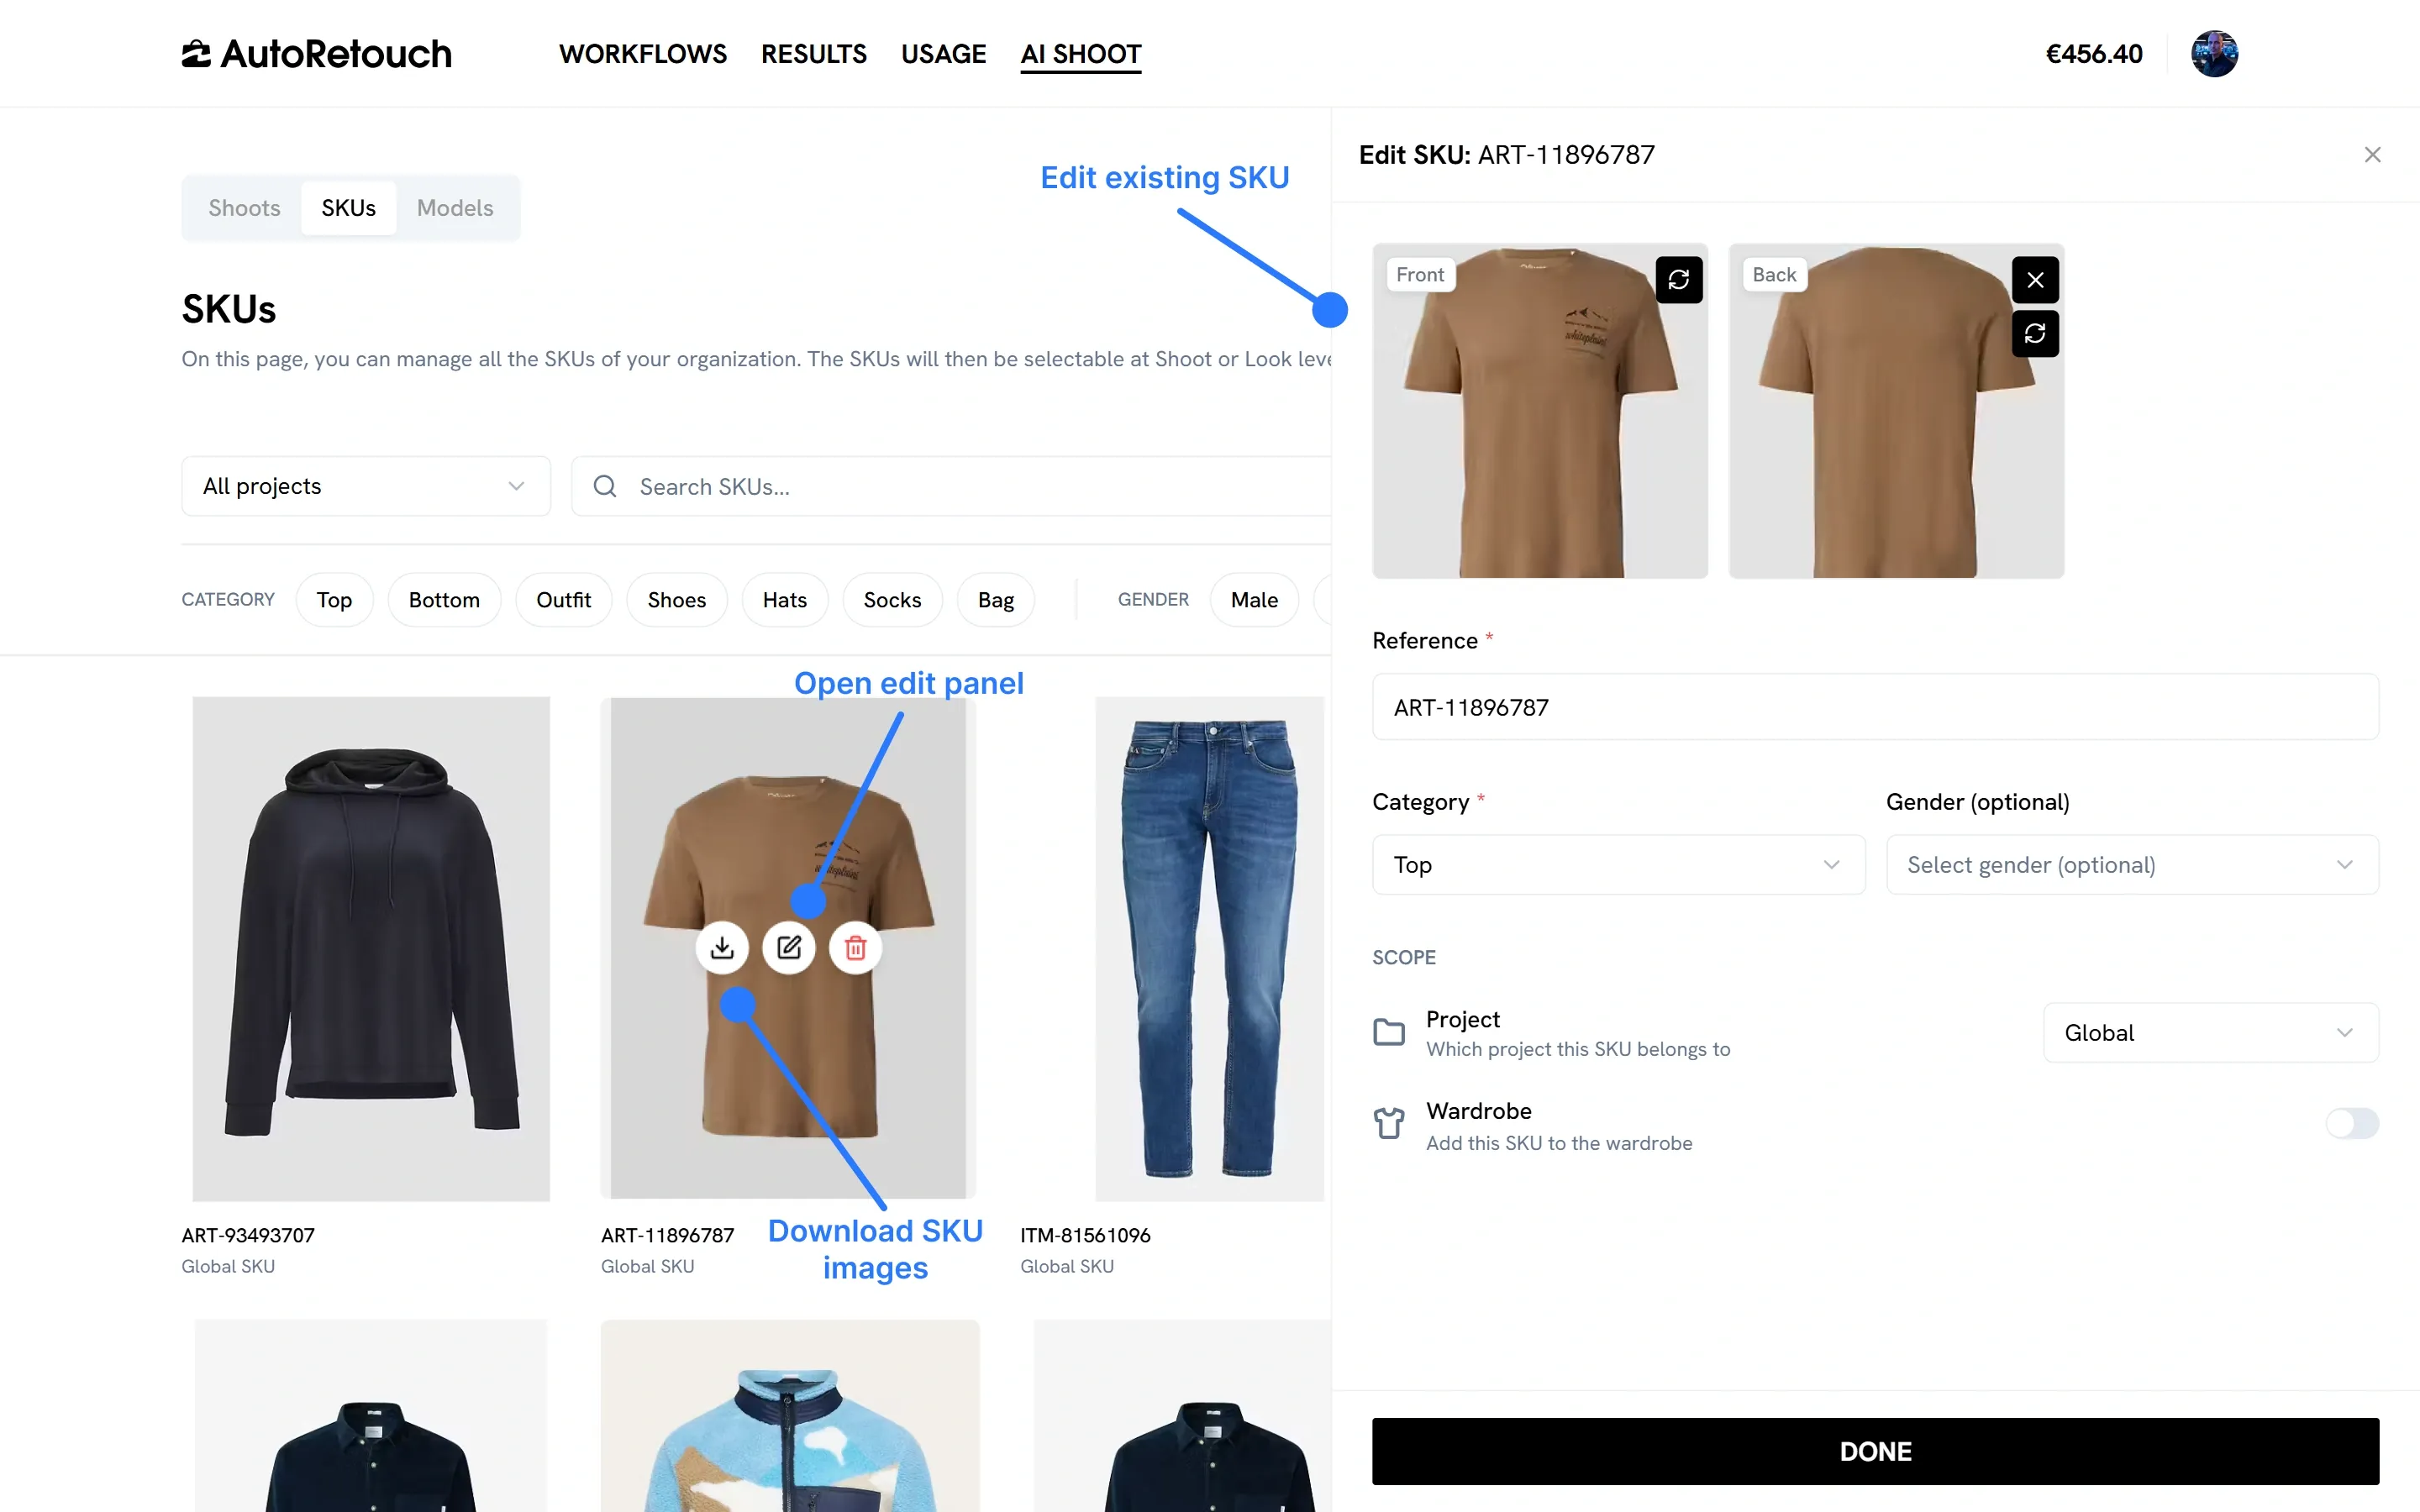
The edit panel lets you fix anything you got wrong at creation time, or complete a SKU later:
- Images - Replace the front or back image, remove one, or add the missing side to a SKU flagged “Missing back”
- Reference - The SKU name, used as the default Look name and to search your library
- Category - Required, and it determines the styling options available at Look level
- Gender - Optional
- Scope - Move the SKU to another project or leave it global, and add it to the wardrobe
Click “Done” to save your changes.
Next steps
Section titled “Next steps”With your SKUs ready, you can move on to creating your first AI Shoot.
To manage SKUs programmatically, see the AI Shoot API documentation.